How To Make A DJ Mix: Step-By-Step With Gear Or
Software
Every great DJ set you've heard at a festival, in a club, or on a livestream started the same way, someone sat down and figured out how to make a DJ mix that actually works. It sounds simple on paper: pick tracks, blend them together, hit record. But the gap between a sloppy bedroom recording and a polished, shareable mix comes down to technique, preparation, and the right tools.
Whether you're using CDJs, turntables, or just a laptop with DJ software, the core process follows the same logic. You select tracks that fit together, arrange them in a sequence that builds energy, and execute clean transitions that keep listeners locked in. This guide breaks all of that down into clear, actionable steps, from choosing your gear and organizing your library to recording and editing the final product.
At RIKIO ROCKS, we cover the EDM scene daily, the artists, the festivals, the releases, the culture. But none of that exists without DJs who put in the work behind the decks. This guide is for anyone ready to stop just listening and start creating. Let's get into it.
What a DJ mix is and what you need
A DJ mix is a continuous, uninterrupted recording of multiple tracks blended together in a deliberate sequence. Unlike a playlist that queues songs back to back with silence in between, a mix uses transitions, tempo matching, and sometimes effects to make the entire listening experience feel like one cohesive piece of music. The DJ controls when each track enters, how long it plays, and exactly how it hands off to the next one. That level of control is what separates a mix from hitting shuffle.
What makes a DJ mix different from a playlist
The core difference is intentional flow. A playlist is passive. A mix is a performance, even when nobody is watching. Every transition you build reflects a decision about energy, mood, and timing. When you learn how to make a DJ mix, you stop thinking like a music fan and start thinking like someone responsible for the entire arc of a listening experience.
The transitions you choose tell listeners where the energy is going before the next track even drops.
Good mixes also follow a structured energy curve. Most start with tracks that ease the listener in, build intensity through the middle section, peak at the right moment, and then bring the energy back down before the end. That structure does not happen by accident. It comes from deliberate track selection, thoughtful sequencing, and a clear idea of where you want the listener to end up emotionally by the final track.
The two main setups: gear vs. software
Your choice of setup shapes your workflow, your upfront cost, and how tactile the whole experience feels, but it does not change the fundamental skills you need to build. Both routes let you record a finished, shareable mix. The main difference is how physically hands-on the process is and what kind of investment you are willing to make before you start.
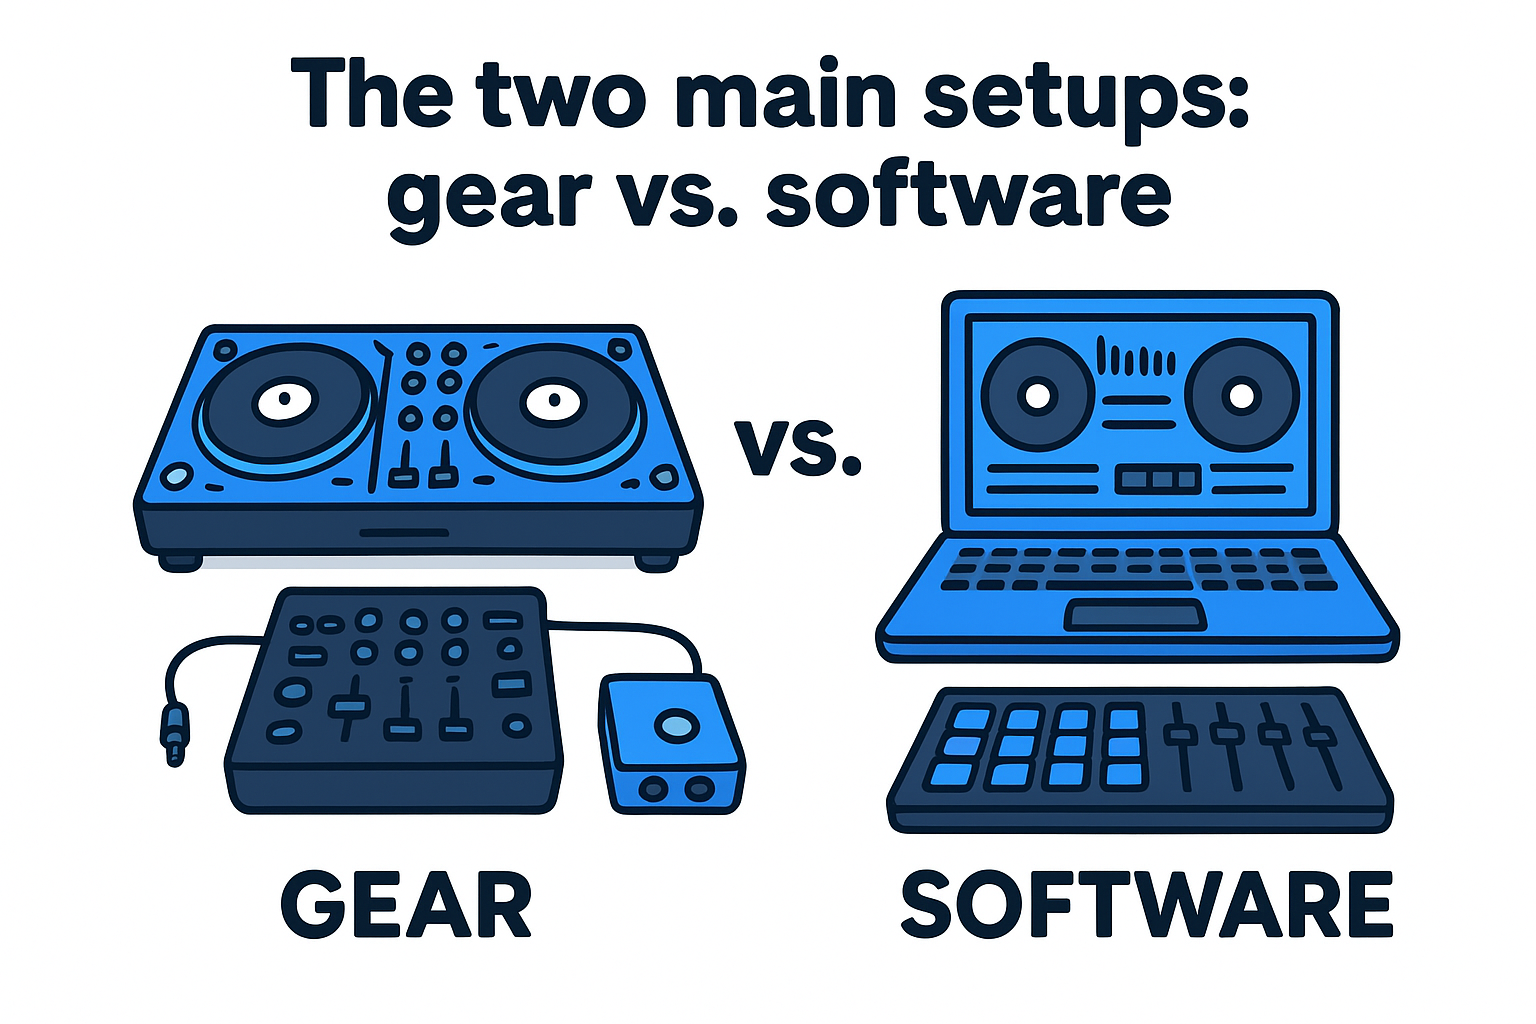
Here is a breakdown of both approaches:
|
Setup
|
What you need
|
Best for
|
|
Hardware (CDJs or turntables + mixer)
|
Two decks, a DJ mixer, audio interface, cables
|
Club-style practice, building muscle memory
|
|
Software only (DJ app on laptop)
|
Laptop, DJ software, optional MIDI controller
|
Low cost, portability, getting started fast
|
Hardware setups give you physical knobs and faders to work with, which trains your hands for real club and festival environments. Software setups let you jump in immediately without a large gear investment. Most major DJ apps offer free tiers or demo versions that give you full recording capability, so the barrier to entry is lower than it has ever been.
Recording your output is one thing beginners often overlook. Hardware mixers typically send audio via USB or RCA outputs into a computer or standalone recorder. Software setups, by contrast, record directly inside the application, which removes one step from your signal chain and keeps the setup simple.
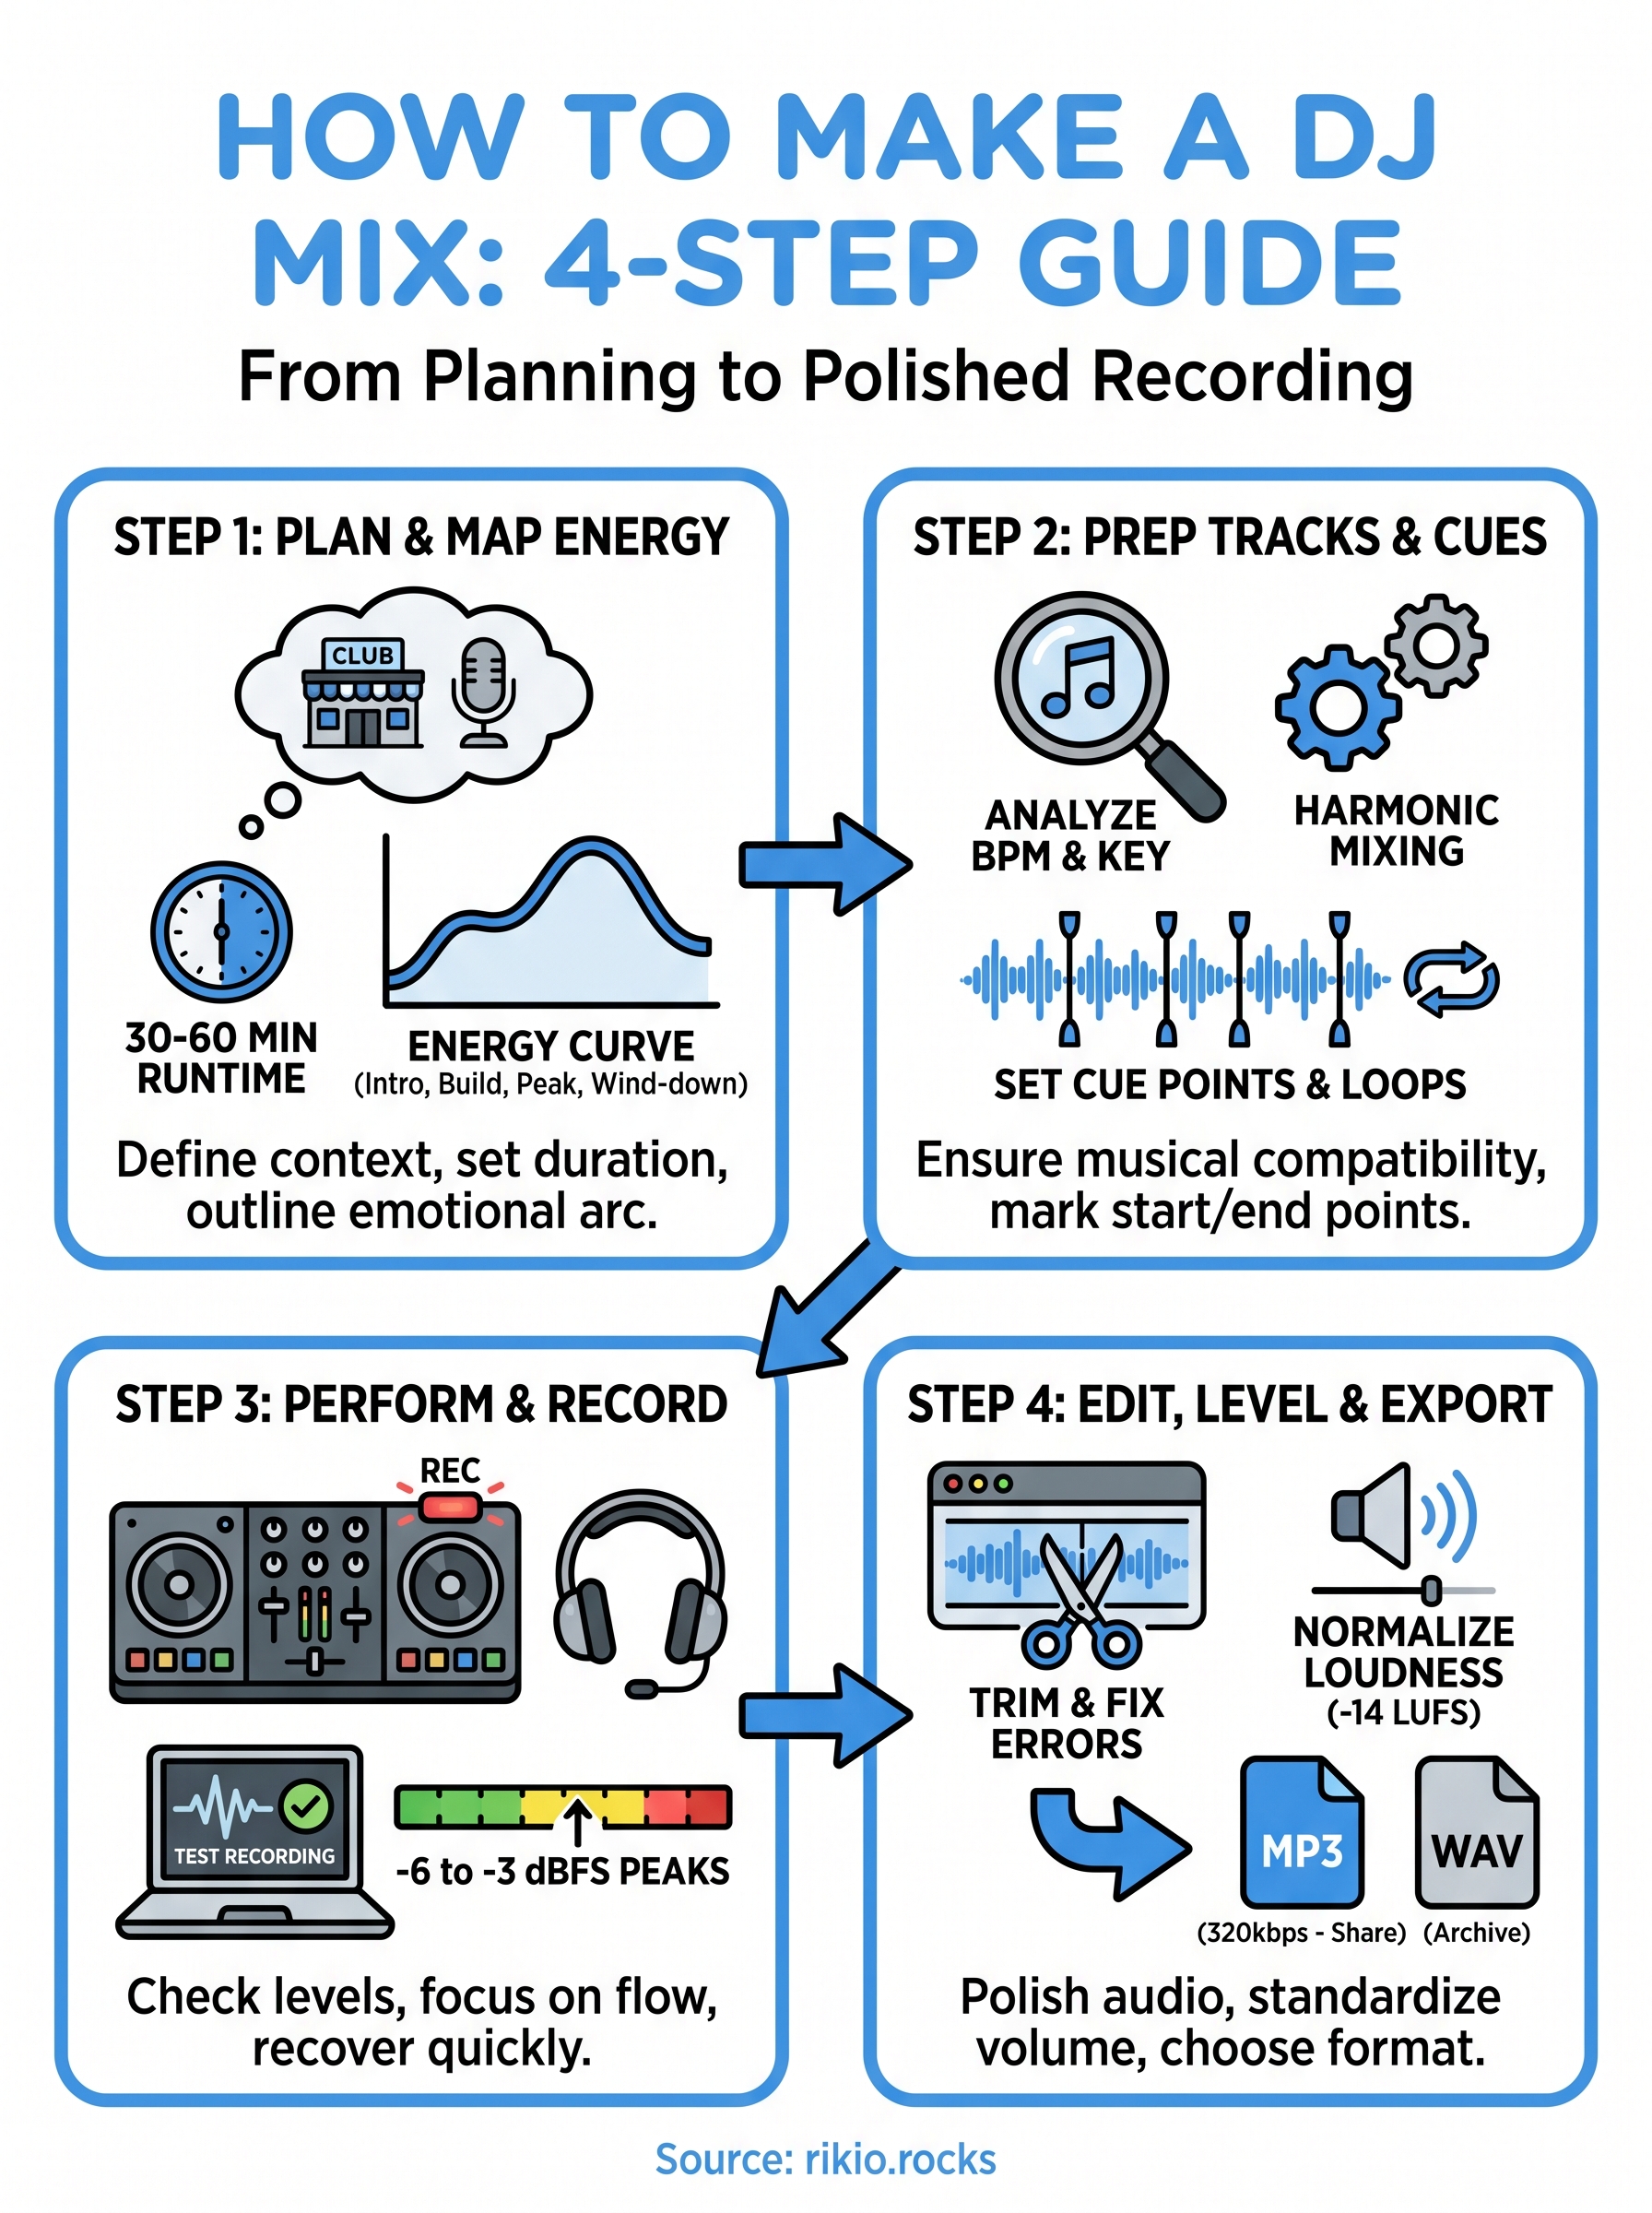
Step 1. Choose a goal and map the energy
Before you select a single track, you need to answer one question: what is this mix for? A mix made for a festival warm-up set feels completely different from one built for a late-night club recording or a promotional mix you plan to post online. Defining the context upfront shapes every decision you make after it, from the tempo range you work in to how aggressively you push the energy.
The clearest mixes come from DJs who knew exactly what they were building before they opened a single track.
Define the context and runtime
Your mix needs a clear purpose and a realistic runtime before you start pulling tracks. Most beginner mixes run between 30 and 60 minutes, which gives you room to build a proper arc without losing the listener. Here are the most common mix types and what they typically demand:
|
Mix type
|
Typical runtime
|
Energy profile
|
|
Warm-up / intro mix
|
30-45 min
|
Low to mid, steady build
|
|
Peak-hour club mix
|
45-60 min
|
Mid to high, explosive peaks
|
|
Promotional / demo mix
|
20-30 min
|
Best tracks front-loaded
|
|
Podcast / radio mix
|
60-90 min
|
Full arc, multiple peaks
|
Picking the right category tells you how many tracks you need and where the intensity should land at each point in the recording.
Map the energy curve before you load a track
An energy map is a simple written plan that outlines the emotional trajectory of your mix from start to finish. You do not need any software for this step, just a notepad or a text file. A basic template looks like this:
-
Intro (tracks 1-2): Low energy, under 126 BPM, eases listeners in
-
Build (tracks 3-5): Gradually rising intensity, introduce main elements
-
Peak (tracks 6-8): Highest energy, signature tracks land here
-
Wind-down (tracks 9-10): Pull back the tempo, close on a strong note
Following a structure like this is one of the core principles behind learning how to make a dj mix that keeps people listening from the first track to the last.
Step 2. Prep tracks for clean transitions
Track preparation is the step most beginners skip, and it is exactly why their mixes fall apart mid-transition. Clean transitions depend on knowing your tracks before you perform them, which means analyzing BPM, musical key, and setting cue points in your DJ software or on your hardware before you hit record. Spending 20 to 30 minutes on prep work saves you from scrambling during the actual performance and lets you stay focused on the mix itself.
Analyze BPM and key before you build your cue list
Your DJ software can auto-analyze tempo and key for every track in your library, and you should run that analysis before you finalize your tracklist. Matching keys keeps your transitions from sounding musically wrong, and matching or closely related BPMs means your beatmatch will hold without constant manual correction. Most software uses a system called harmonic mixing, often labeled using Camelot or Open Key notation, to show you which tracks are musically compatible with each other.
Mixing tracks in the same or compatible keys removes the most common reason a transition sounds wrong even when the beats are perfectly aligned.
Here is a quick reference for compatible key relationships using Camelot notation:
|
Transition type
|
Camelot move
|
Effect
|
|
Same key
|
8A to 8A
|
Seamless, transparent blend
|
|
Adjacent key
|
8A to 9A or 7A
|
Subtle energy shift
|
|
Relative major/minor
|
8A to 8B
|
Clear mood change
|
Set your cue points and loop markers
Cue points mark exact moments in a track where you want to start a transition, trigger a drop, or jump to a specific section without scrubbing through the waveform. Set at least two per track: one at the first downbeat, and one at the point where you plan to bring the track in during your mix. Loop markers let you extend a section if a transition runs long or if you need extra time to lock in your beatmatch without the track advancing past your target moment.
Knowing how to make a dj mix that sounds polished rather than reactive usually comes down to this kind of preparation. Pre-set cue points and analyzed tracks do a large portion of the heavy lifting before you ever touch a fader.
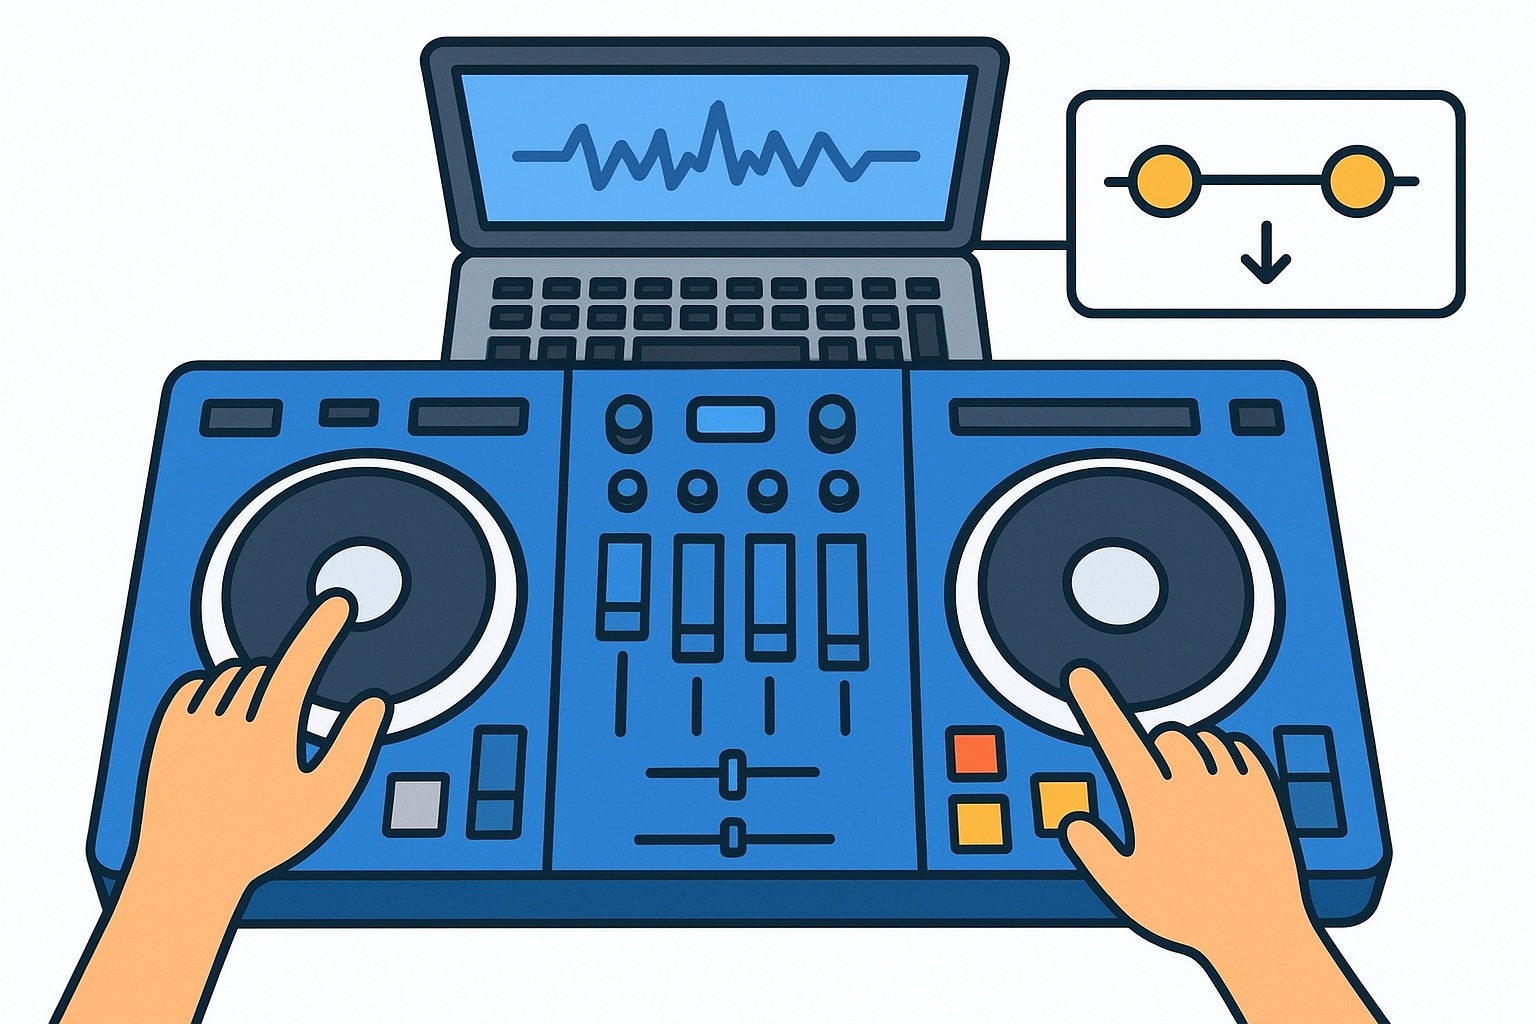
Step 3. Perform and record your mix
With your energy map set and your tracks prepped, it is time to perform. Before you touch a fader, confirm your recording is actually capturing audio and that your output levels are healthy. A mix that peaks into the red sounds distorted and unprofessional, while one that is too quiet forces listeners to crank their volume just to hear it. Check your recording software or hardware recorder and aim for peaks between -6 dBFS and -3 dBFS across the full mix.
Set your recording chain before you press play
The recording chain is the signal path from your mixer or software output to the file on your hard drive. In a hardware setup, this usually means routing your master output into an audio interface connected to your computer, then recording with a program like Audacity. In a software-only setup, your DJ app handles the recording internally, with most apps offering a dedicated record button in the main interface. Either way, run a 30-second test recording before you start the full mix to confirm the signal is clean and the file is saving correctly.
A failed recording after a clean 60-minute performance is one of the most frustrating experiences in DJing, so test your chain every single time.
Execute transitions with focus, not perfection
When you actually perform, your job is to stay one or two tracks ahead of whatever is currently playing. Load the next track, check the waveform, confirm your cue point is set, and have the beatmatch ready before the current track reaches its exit point. Transition mistakes are recoverable if you stay calm and move quickly, but panicking and fumbling multiple controls at once will always make it worse. Part of learning how to make a dj mix that sounds live and natural is accepting that small imperfections are fixable in the edit step, so keep moving forward instead of stopping to redo a transition mid-recording.
Step 4. Edit, level, and export the final file
Your recording is done, but the mix is not finished. Raw recordings almost always need at least minor editing, whether that means trimming dead air at the start, fixing a clunky transition in the middle, or bringing the overall loudness up to a level that matches professionally released mixes. This step is where you turn a good performance into a clean, shareable file that sounds right on speakers, headphones, and phone earbuds alike.
Trim, fix, and level your recording
Open your recording in a free audio editor like Audacity and start with a full listen-through while watching the waveform. Mark any moments where a transition felt rough, where the volume dropped unexpectedly, or where a technical hiccup is obvious to the ear. Most small errors can be smoothed with a short crossfade between two nearby regions rather than re-recording the full section.
A crossfade of just 50 to 200 milliseconds is often enough to hide a cut that would otherwise sound abrupt.
After fixing edits, apply loudness normalization to the full file to bring your mix up to a standard listening level. A target of around -14 LUFS works well for streaming platforms and gives your mix enough headroom to avoid distortion on playback. Most audio editors include a built-in normalize or loudness tool that handles this in one step.
Export settings that work everywhere
When you export, your format choice affects both file size and audio quality. Use the table below as a quick reference for the most common situations:
|
Use case
|
Format
|
Settings
|
|
Streaming or sharing online
|
MP3
|
320 kbps, 44.1 kHz
|
|
Archiving or submission
|
WAV
|
16-bit or 24-bit, 44.1 kHz
|
|
Podcast platform upload
|
MP3
|
192 kbps minimum
|
Knowing how to make a dj mix that translates well across different playback systems comes down to exporting at the right quality and always keeping a lossless WAV backup of your master file before converting to MP3. Label your file clearly with the mix name, date, and genre so it stays organized as your archive grows.
Your next mix
You now have everything you need to understand how to make a dj mix from the ground up. You picked a goal, mapped your energy curve, prepped your tracks, recorded a clean performance, and edited the final file to a professional standard. Every step builds on the one before it, and the more times you run through the full process, the faster and more natural each part becomes.
Your first mix will not be perfect, and that is fine. The point is to finish it, listen back critically, and identify one or two specific things to improve on the next run. Most DJs who sound polished today simply made more mixes than everyone else around them. Keep building your library, keep refining your transitions, and keep tracking what works. When you need a ready-made energy boost for your next workout session, check out the CARDIO HITS 2026 playlist on Spotify and stay connected to the scene at RIKIO ROCKS.
149